It has been asked a number of times, “How can I use my Active Directory user accounts to manage NSX-T?” Well, that is why you’re reading this post, right?
It is a very straight forward process, let’s take a look:
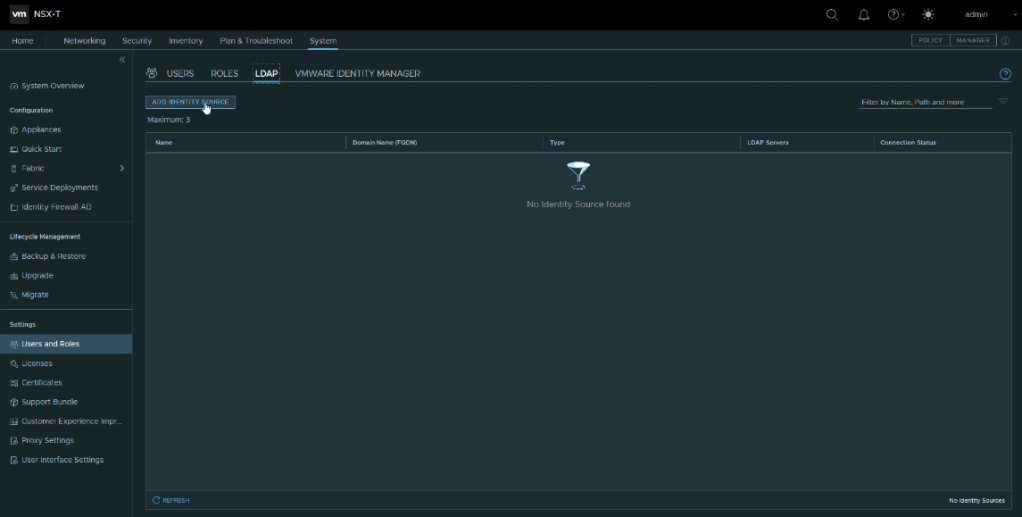
We start by navigating to the Users and Roles under Settings, choose the LDAP tab, and select “ADD IDENTITY SOURCE.”
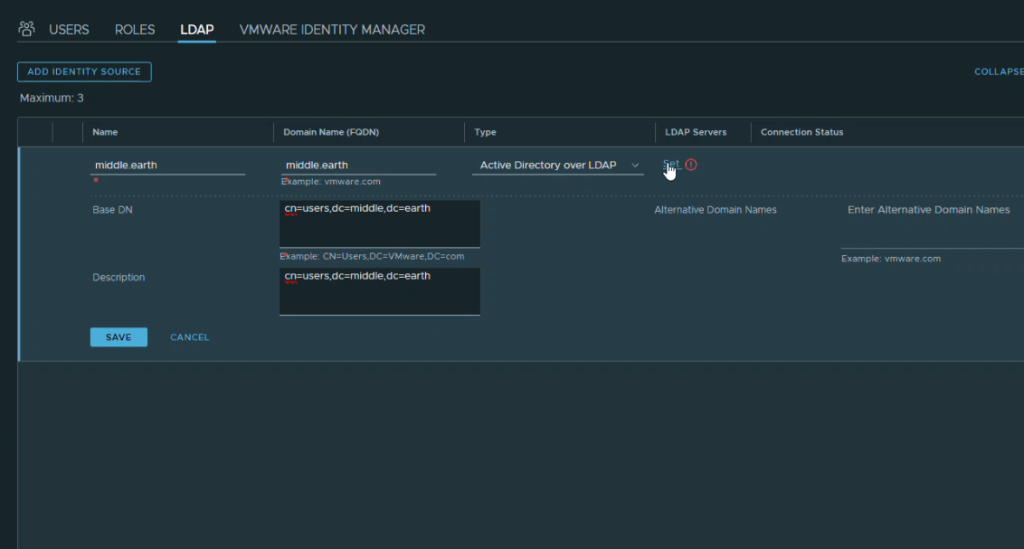
Next, we configure the settings for the Identity Source (Active Directory, usually). Name and BaseDN are required, then we select “Set” to enter the location and credentials for the LDAP Server. This can be any of the Domain Controllers (DC) that are running Active Directory. I like to use a Global Catalog enabled DC to lessen the amount of traffic on the network.
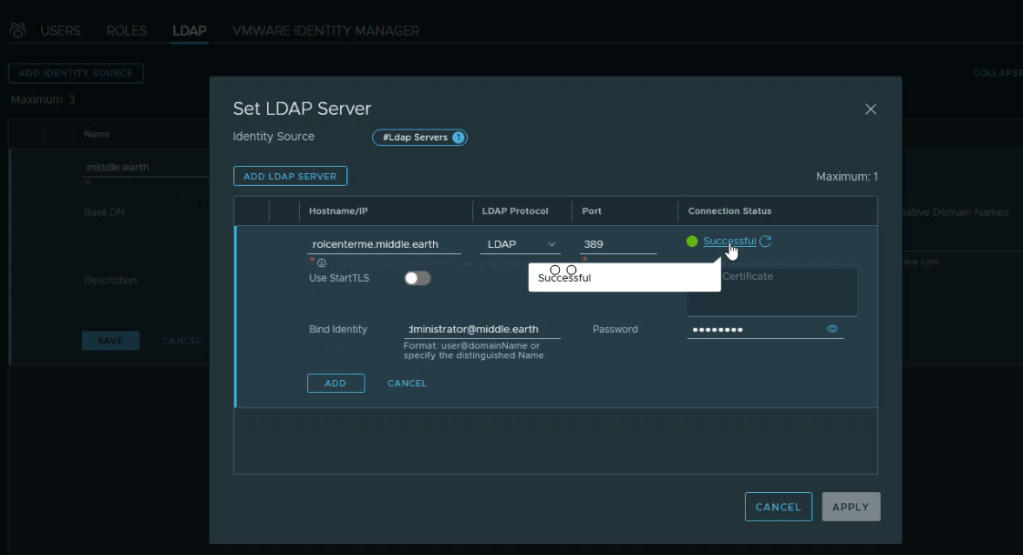
With the successful configuration of the Identity Source with the LDAP server identified, the next step is to add users from Active Directory. Slide over to the USERS tab and select ADD and Add Role Assignment for LDAP. The registered source (Active Directory) will appear in the Search Domain drop down menu. As you begin to type in the name of the user, an option to select the full account name automatically appears. Then you assign a Role to provide the appropriate authority for the user.

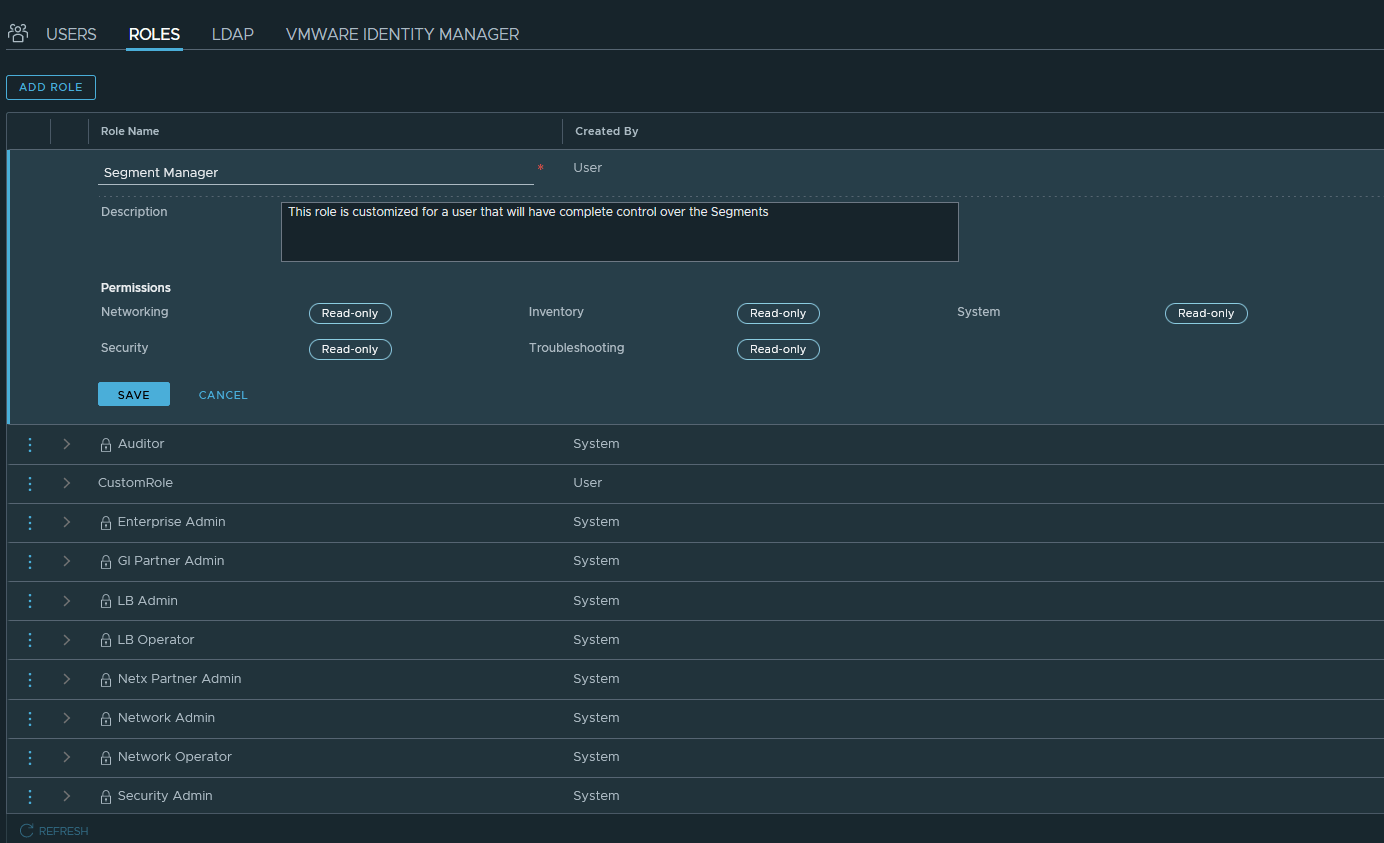
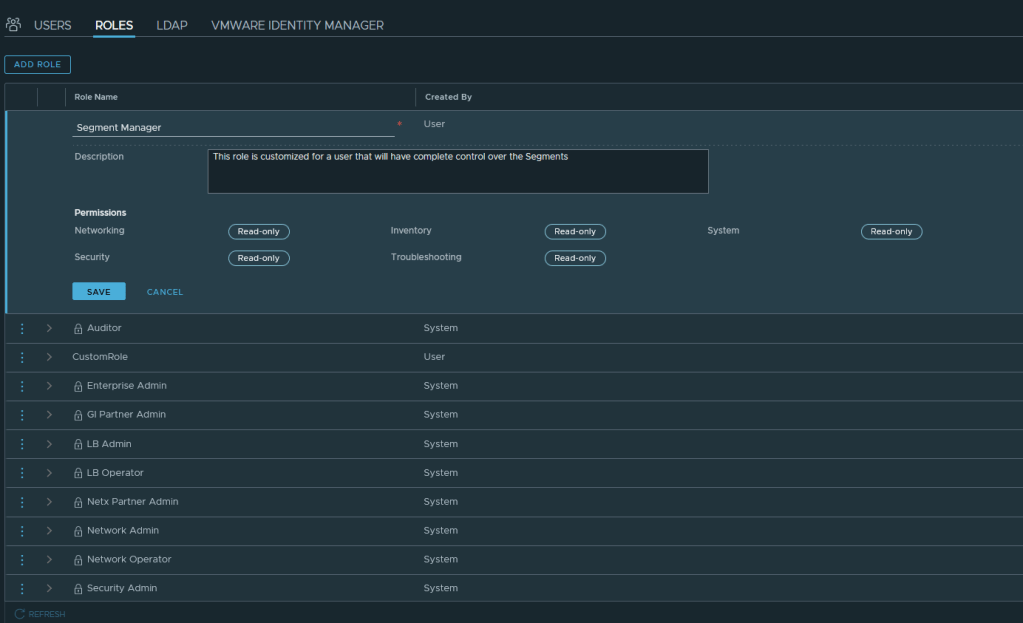
But what if the Role is not exactly what you want for a specific user? Ah, introducing “Custom Roles.” Slide over to the ROLES tab and select ADD ROLE.
Once you enter a name, select any of the oval “Read-only” icons. That will open the Set Permissions dialog box with the ability to change a variety of permissions to Read-only, Full Access, or None.
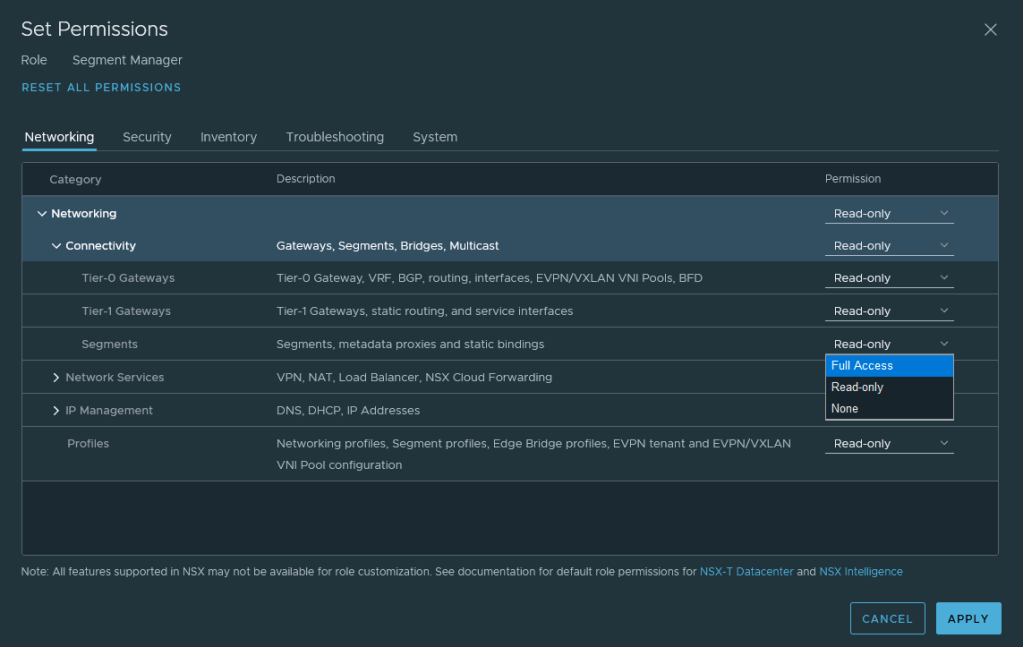
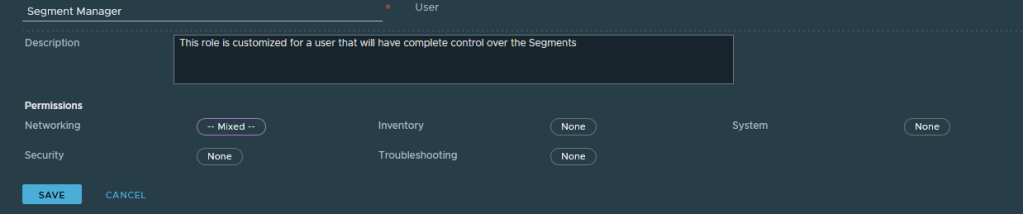
While Full Access and Read-only are fairly obvious, let’s take a look at what happens with None. We finish the Custom Role for Segment Manager with all other permissions set to None.
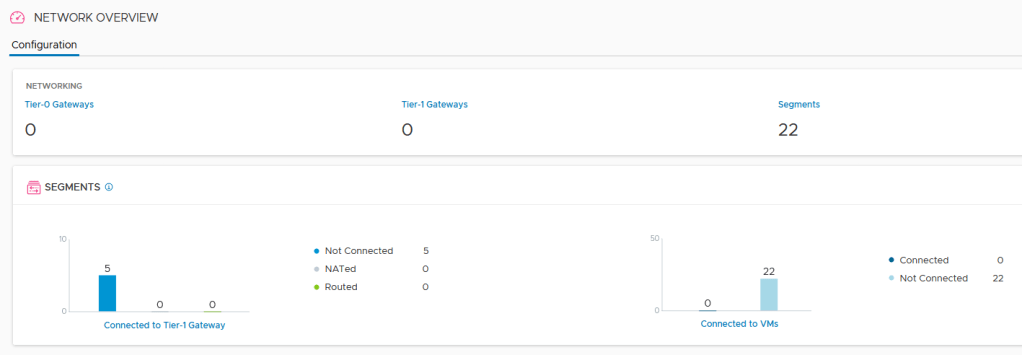
When we log in as a user assigned Segment Manager Role, his visibility into NSX-T is quite different. I changed his view icon to daylight (light view) for contrast.
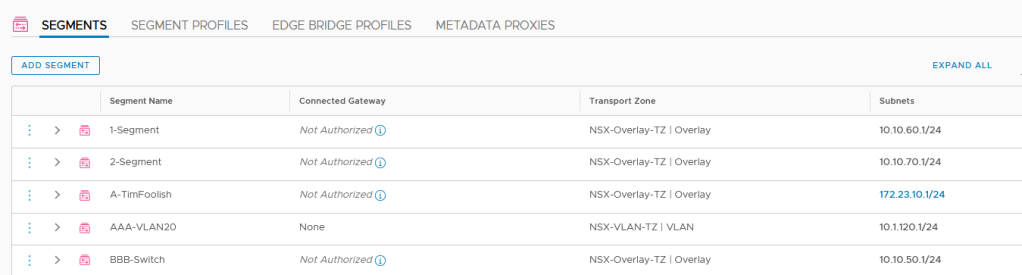
The Network Overview shows 0 Gateways for this user, but all the Segments are visible. No Security or Services even appear in the GUI for a user with this role. You can also see that the “Connected Gateway” field in the Segments shows that this user is “not authorized.” If the user tried to add a gateway (e.g. to the AAA-VLAN20 segment) the None remains as the only item in that drop down listing.
So there you have it. Connecting to Active Directory and creating Custom Roles allows you to more effectively manage your NSX-T environment.
Check out the YouTube recording on the vgandalf http://www.youtube.com/c/vgandalf channel to see this happen in a recorded version. Cheers.
